
Learning Russian? You don’t need a special keyboard or stickers to type in Cyrillic. Thanks to the Mnemonic Russian keyboard layout, you can type in Russian using your regular English (QWERTY) keyboard — phonetically and effortlessly.
In this guide, you’ll learn:
- How to enable the Mnemonic layout (Windows & Mac)
- How to type Russian phonetically (e.g. privet → привет)
- The best online virtual Russian keyboards
- How to type in Russian on your phone using Gboard
- And how to quickly switch between Russian and English layouts
Let’s make Russian typing easy, if you want to learn the pronunciation and find out the best way to learn Russian you can check my other posts:
What Is the Mnemonic Russian Keyboard?
The Mnemonic layout lets you type Russian phonetically using your regular keyboard. You type words as they sound, and they appear in Cyrillic:
| You Type | Output in Russian |
|---|---|
| privet | привет |
| dom | дом |
| kak dela | как дела |
| ya tebya lyublyu | я тебя люблю |
No memorizing the ЙЦУКЕН layout. No special stickers. Just type and go.
How to Enable the Mnemonic Russian Keyboard on Windows
Works on Windows 10 and 11
- Open Settings > Time & Language > Language
- Click Add a language → choose Russian
- Click Options under Russian
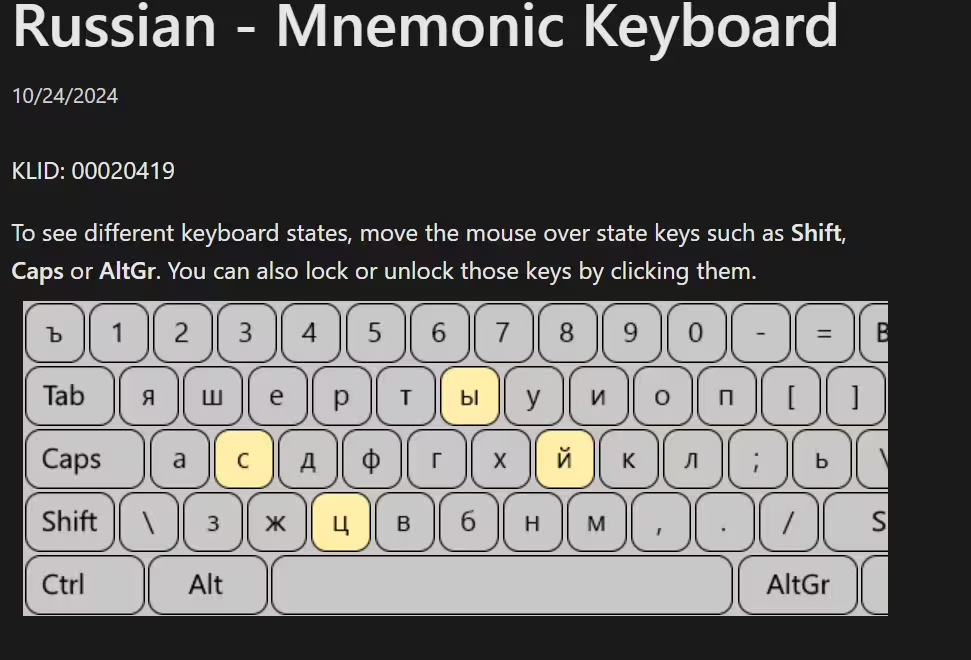
- Under Keyboards, click Add a keyboard → choose Russian – Mnemonic
- Use Windows + Spacebar or Alt + Shift to switch between layouts
How to Enable It on Mac (Phonetic Option)
Mac doesn’t use the same “Mnemonic” label, but there’s a phonetic input method:
- Go to System Preferences > Keyboard > Input Sources
- Click ➕ → add Russian – Phonetic
- Use the flag icon in your menu bar or press Cmd + Space to switch
How to Type in Russian on Your Phone (Use Gboard)
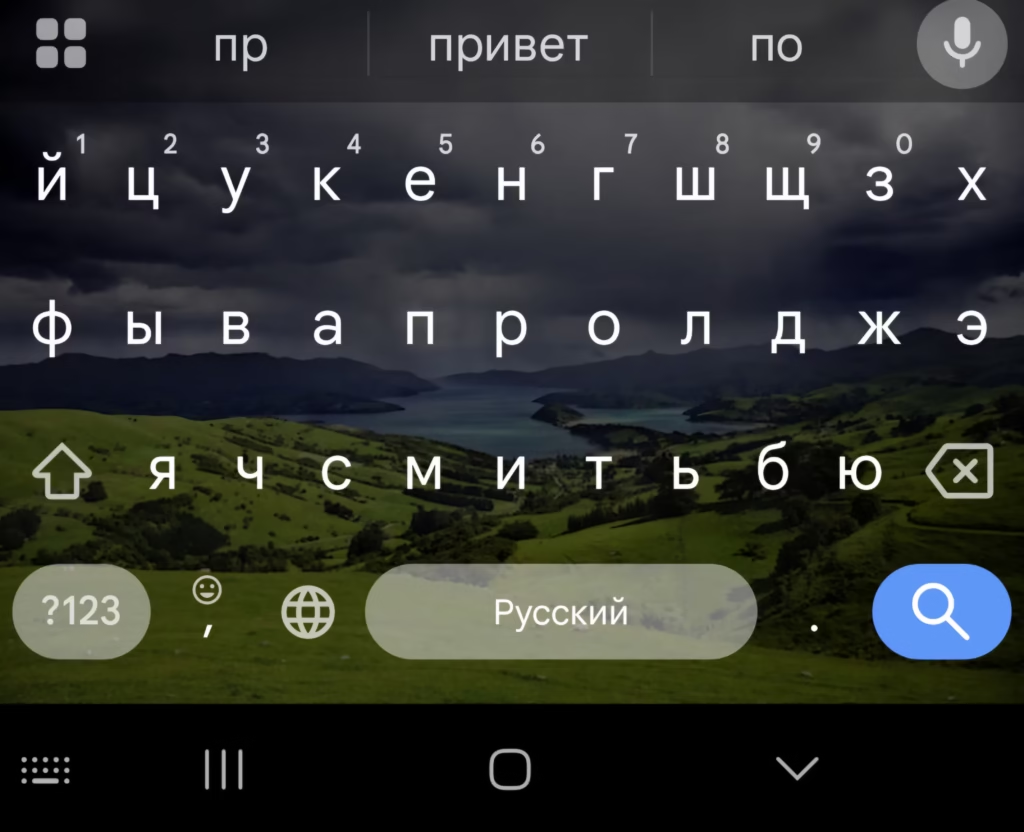
The easiest way to type in Russian on Android and iOS is using Gboard (Google Keyboard):
Android:
- Install Gboard from the Play Store (if not already installed)
- Go to Settings > System > Languages & input > Gboard
- Tap Languages → Add Russian
- Switch by swiping left/right on the spacebar
iPhone:
- Install Gboard from the App Store
- Enable it in Settings > General > Keyboard > Keyboards
- Add Russian and allow full access
- Long-press the globe icon to switch keyboards
With Gboard, you also get smart suggestions, swipe typing, and voice input in Russian!
Virtual Russian Keyboard (No Setup Needed)
Don’t want to change any settings? Try these online Russian keyboards that support phonetic/Mnemonic typing:
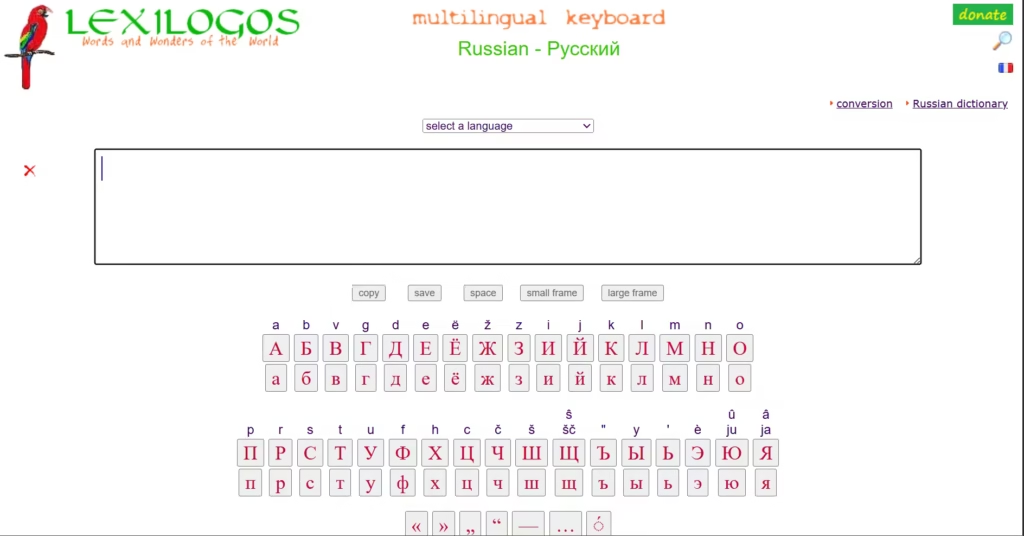
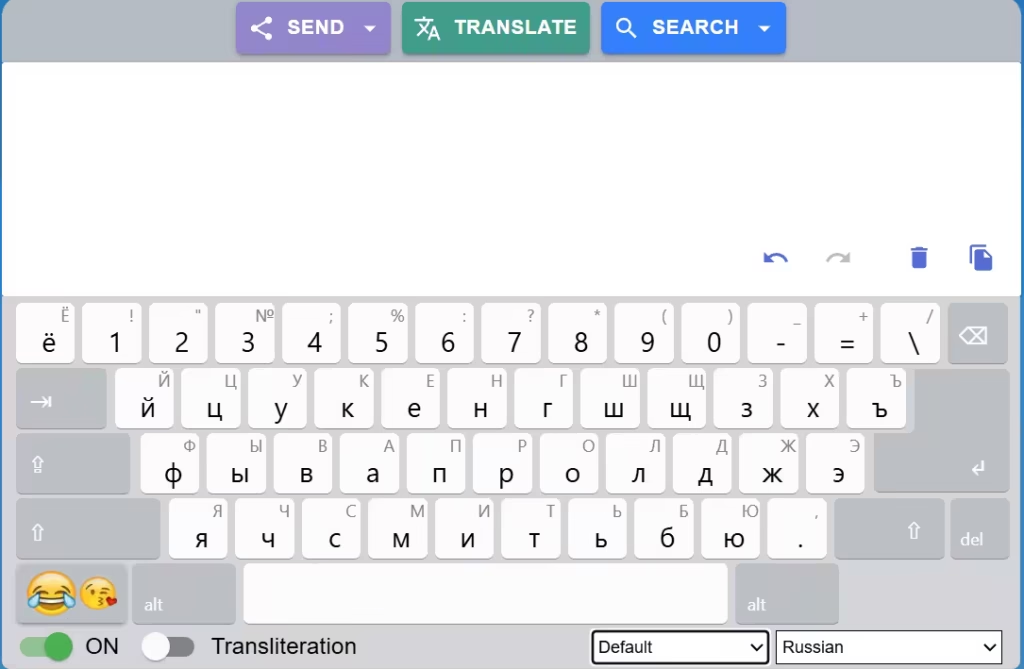
Both are great for practicing or writing quick phrases.
How to Switch Between Russian and English
- Windows: Alt + Shift or Windows + Space
- Mac: Cmd + Space or click the language flag
- Gboard (phone): Swipe spacebar or tap 🌐 icon
Russian Keyboard FAQ
Do I need stickers or a physical Russian keyboard?
No! The Mnemonic layout and phonetic tools let you type using your normal keyboard.
What if I want to learn ЙЦУКЕН later?
You can always switch layouts later. But for most learners, Mnemonic is faster and easier.
Is this layout used in Russia?
No — Russians use ЙЦУКЕН. But for learners, the Mnemonic layout is much easier to start typing fluently.
Final Thoughts
Typing in Russian is way easier than it looks. With the Mnemonic Russian keyboard, you don’t need stickers, new hardware, or to memorize complex layouts.
Whether you’re on desktop or mobile, you can start writing in Russian today using tools that work with your brain — not against it.
Try it now: Go to Gate2Home Russian Keyboard and write your first sentence in Russian today.